Members only

Enter your access code

This training program is private. Enter the code we sent you to unlock it.

Wrong code. Check the message we sent you and try again.

Members training

Your at-home training program

Ten minutes a day with your Goose Golf stick. Work through the phases in order: fundamentals first, then rotations. Watch the reference video, then do the reps slowly. Quality over speed, always.

8 drills · 2 phases · 10 min a day
01

Fundamentals

Hands, stance, posture.

Light gripLight gripLight gripLight grip
01

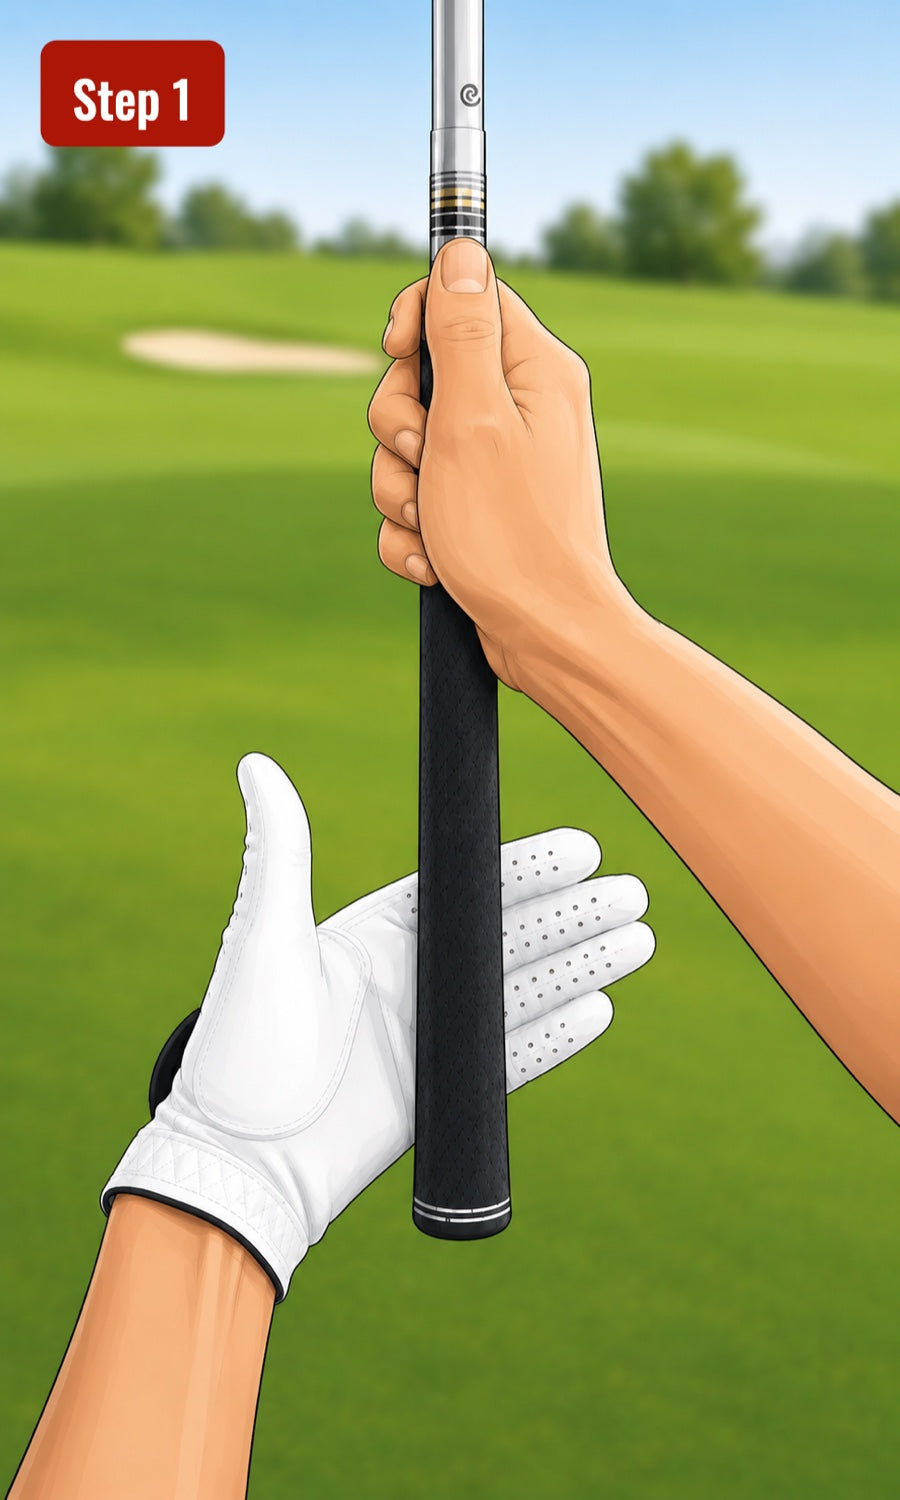
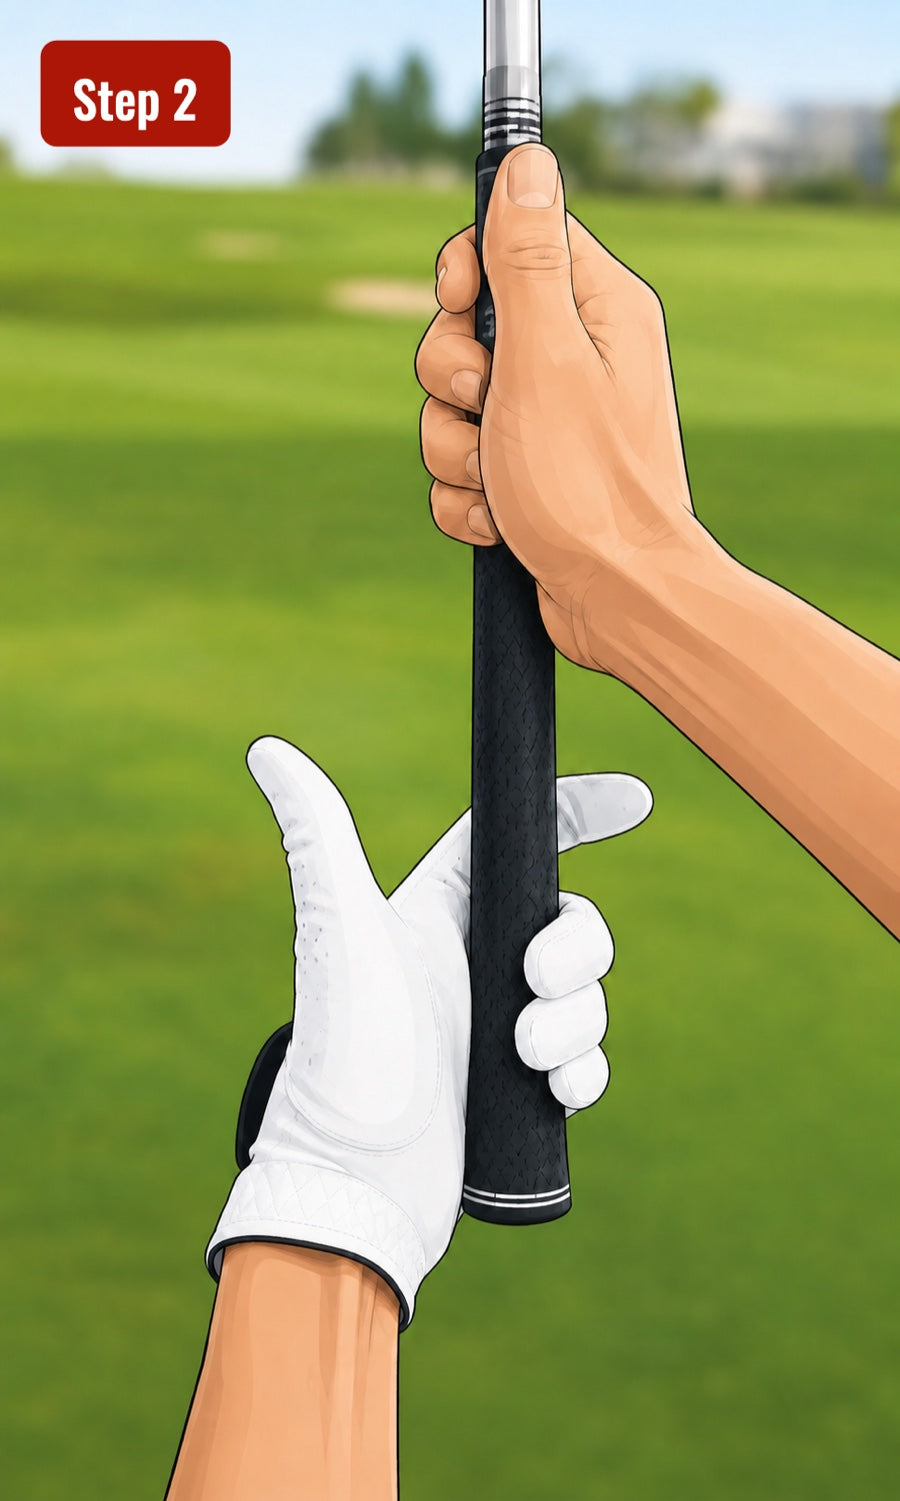
Light grip

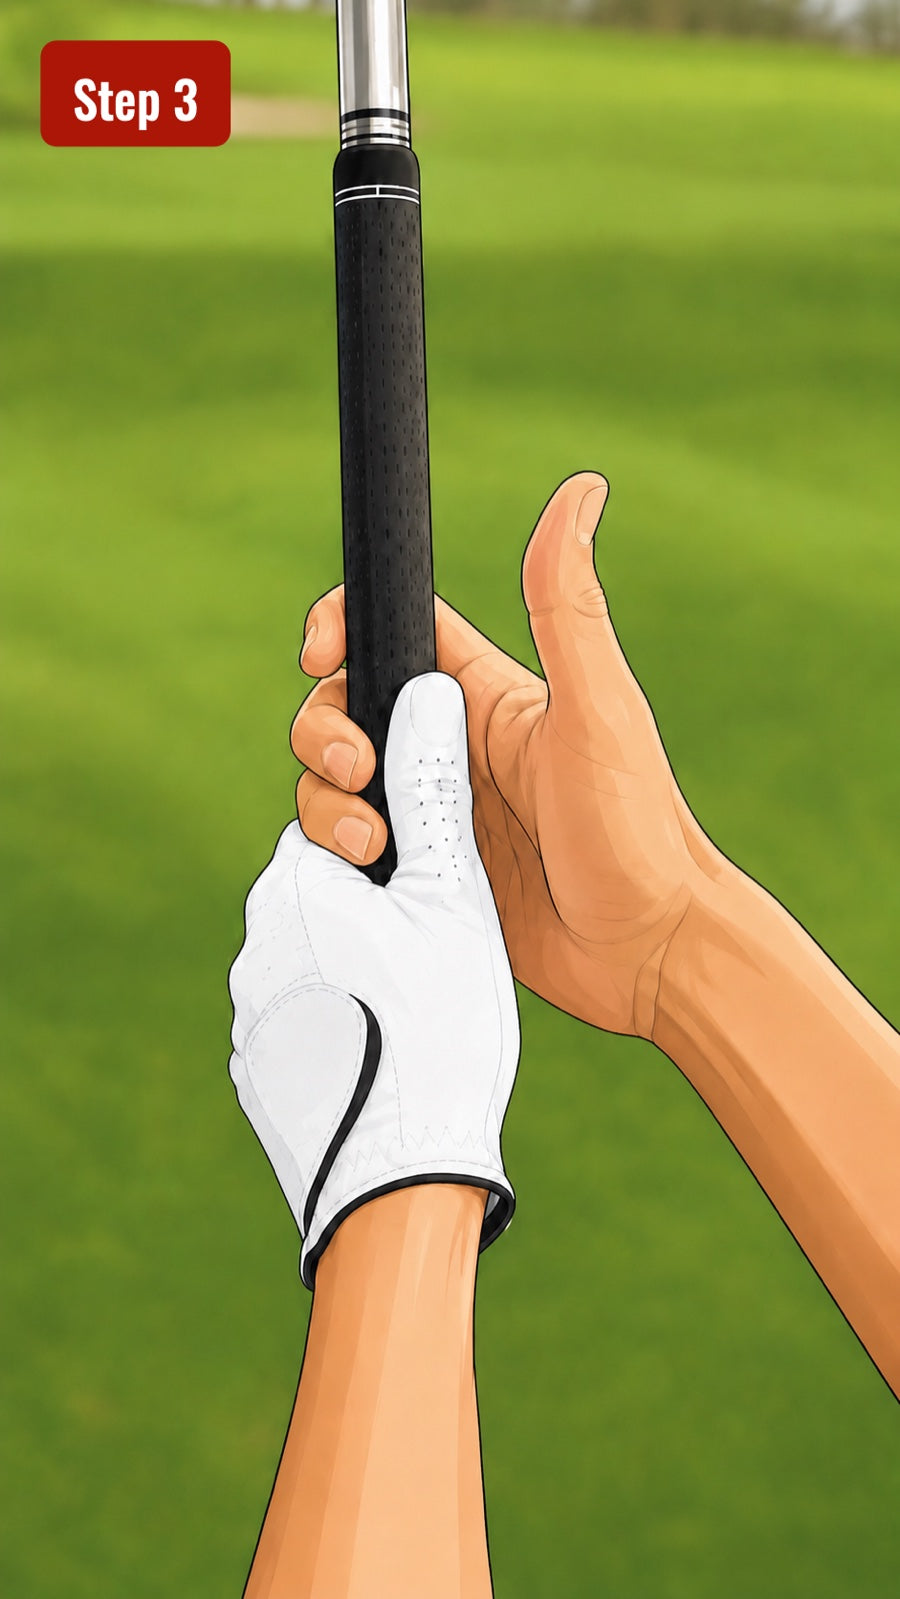
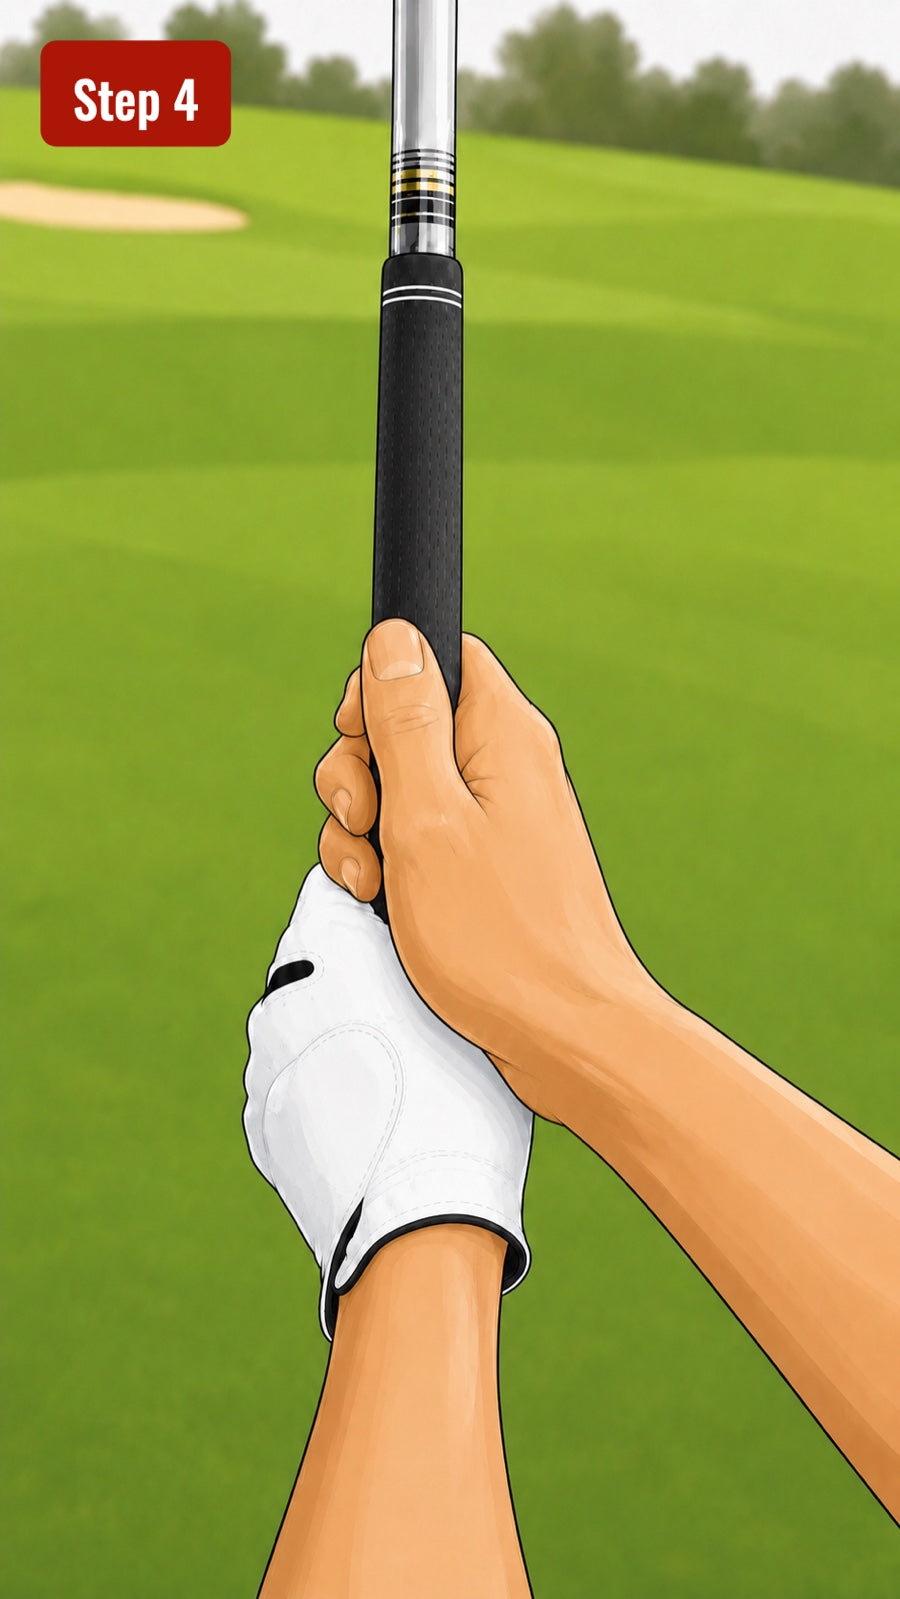
A good grip should not be tight. Hold the stick firmly enough to control it, but lightly enough that the weight can move naturally.

  1. Place your lead hand first, then your trail hand.
    See the method

    This is what the grip is all about. The GooseGrip trainer sets both hands in the correct position, so the feel becomes automatic. Watch how it goes on the club before you start.

  2. Squeeze only enough to hold the stick.
  3. Look for light pressure, around 3 or 4 out of 10.
Athletic posture
02

Athletic posture

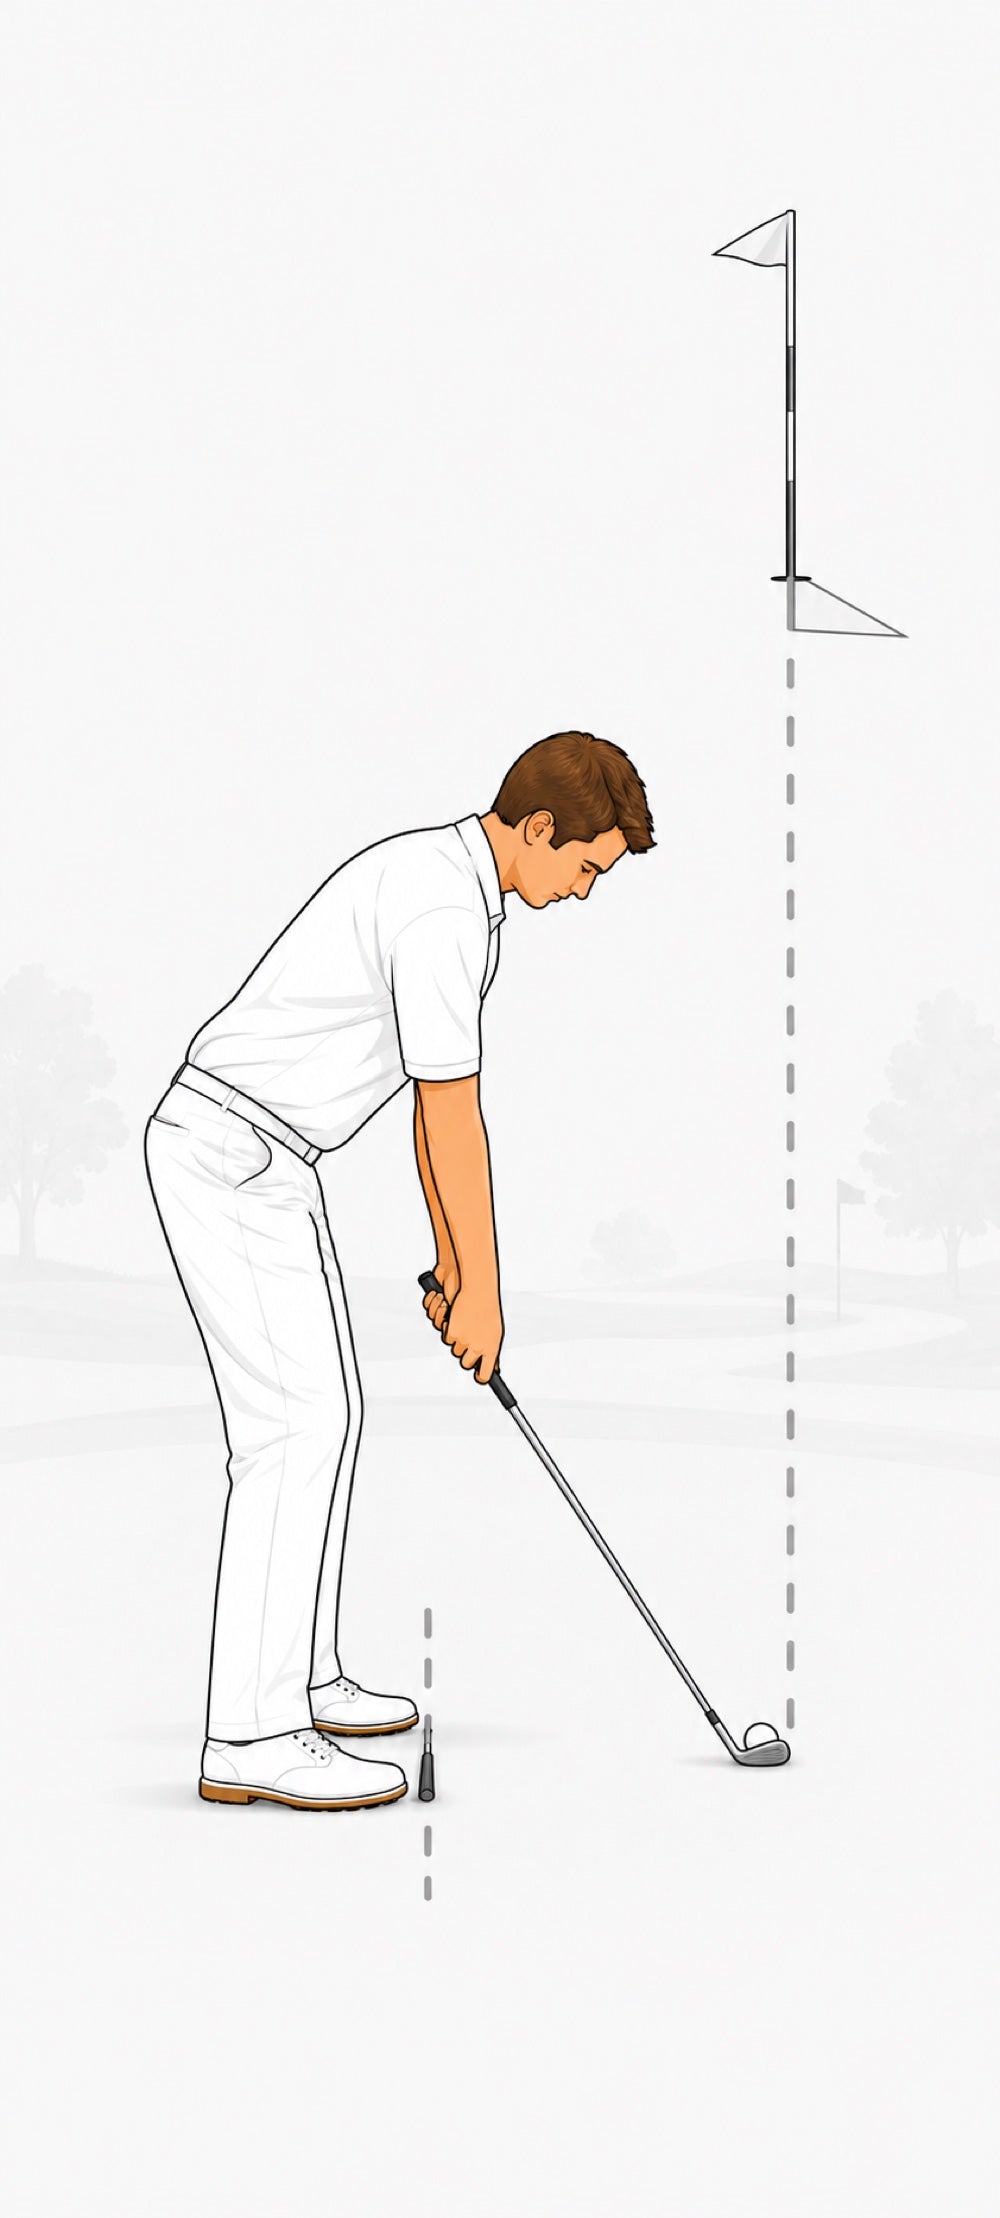
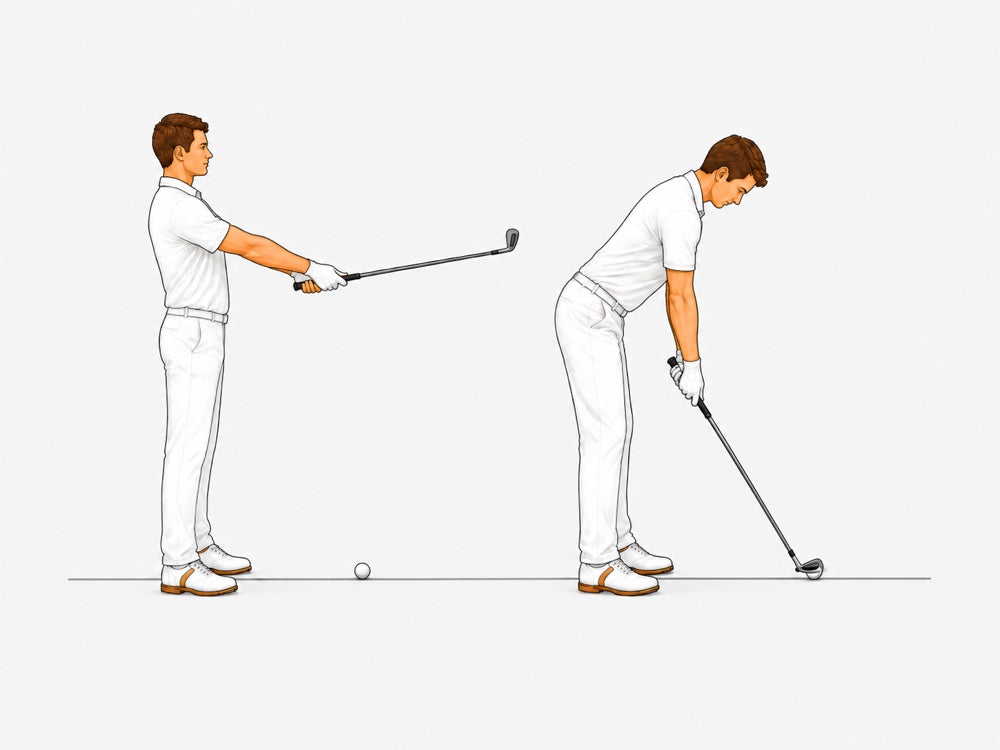
Your posture should feel stable and natural. Push the hips slightly back, keep the back long, let the arms hang, and keep the knees soft.

  1. Stand tall with the stick in front of you.
  2. Push your hips gently back.
  3. Let your arms hang naturally and keep your knees slightly flexed.
Stable stance
03

Stable stance

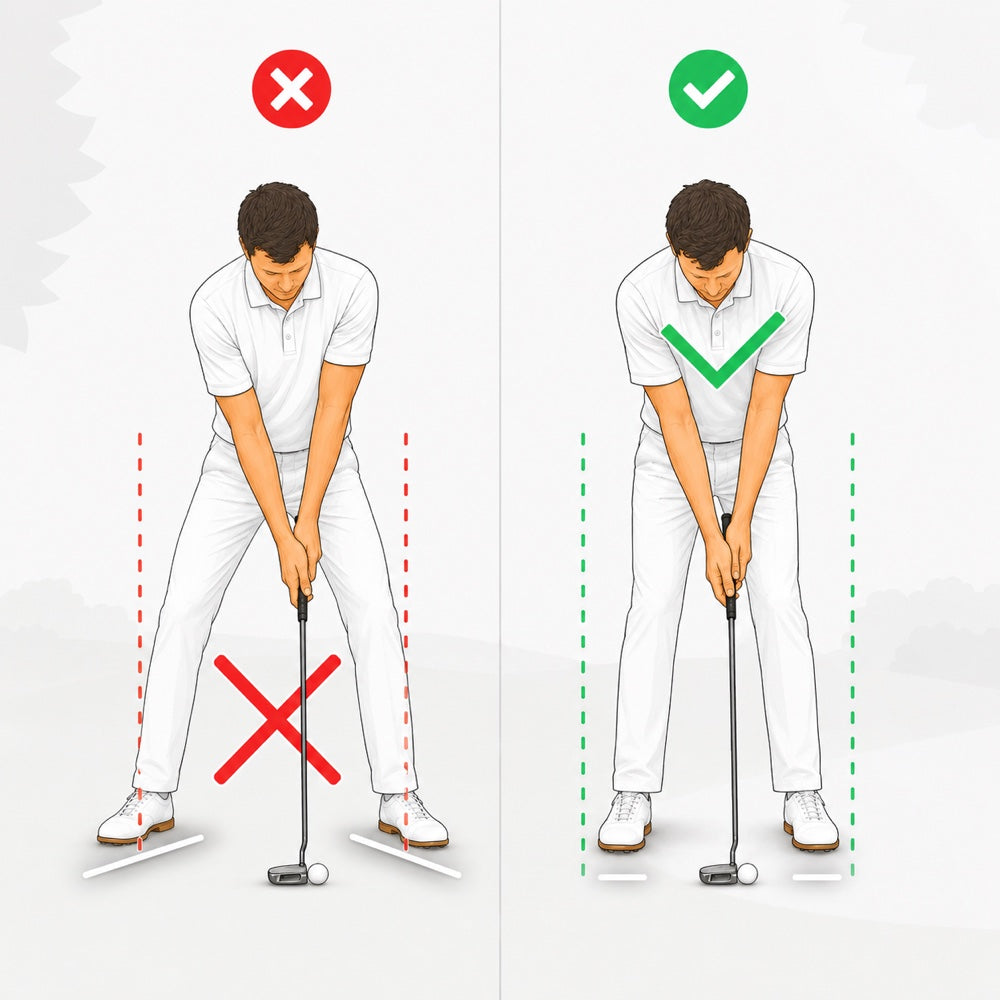
Your stance is your base. Start with your feet around shoulder width, with toes slightly open if that helps you turn.

  1. Place your feet under your shoulders.
  2. Keep your toes almost straight, or slightly open if that feels better.
  3. Check that you can turn your chest without feeling stuck.
Hand position
04

Hand position

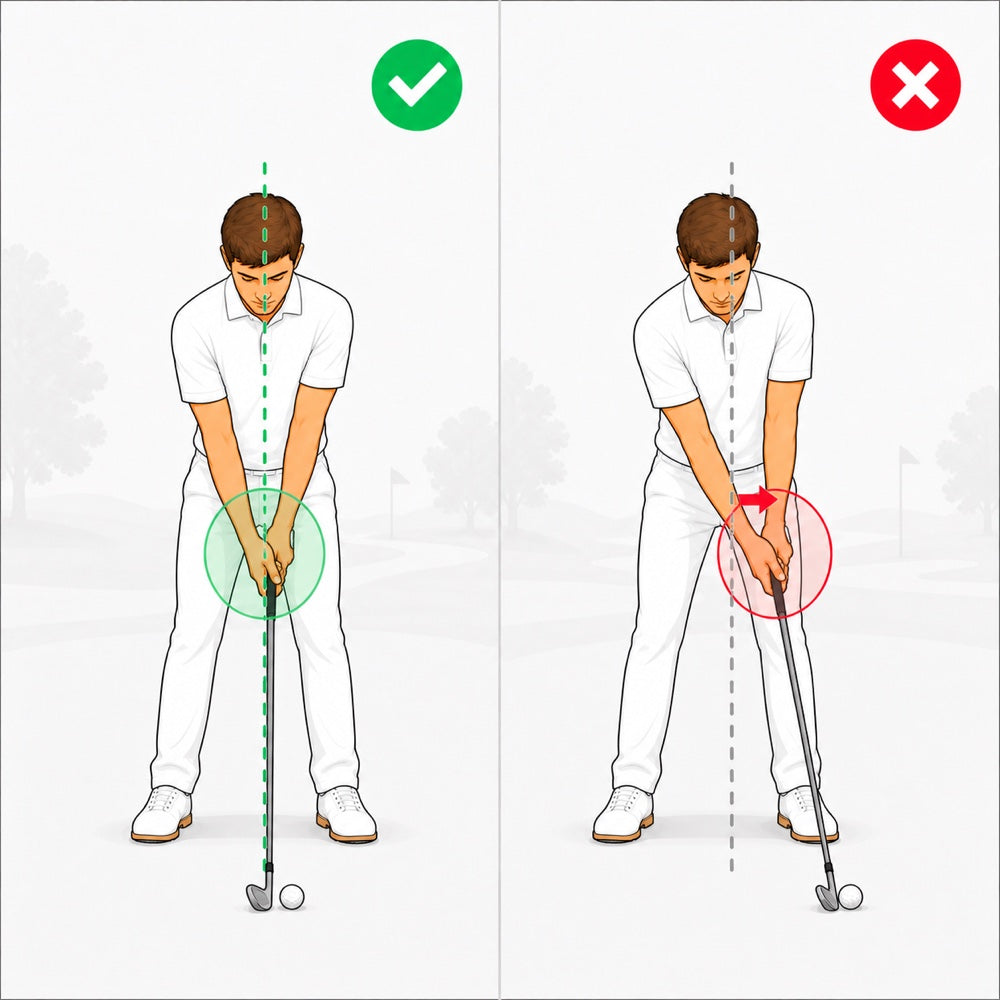
At address, the hands should not be forced far forward or left too centered. For a right-handed player, the handle points slightly toward the lead hip.

  1. Take your normal posture with the stick.
  2. Look where the handle points.
  3. Adjust your hands so the handle leans slightly toward your lead hip.
Stick alignment
05

Stick alignment

The stick can be an alignment reference. It helps you understand the difference between the target line and your foot line.

  1. Place the stick on the ground in the direction you want to aim.
  2. Set your feet parallel to the stick.
  3. Use this reference before you start your movements.
02

Rotations

Takeaway, path, shoulder turn.

Rotational takeaway
06

Rotational takeaway

3 sets of 8 slow takeaways

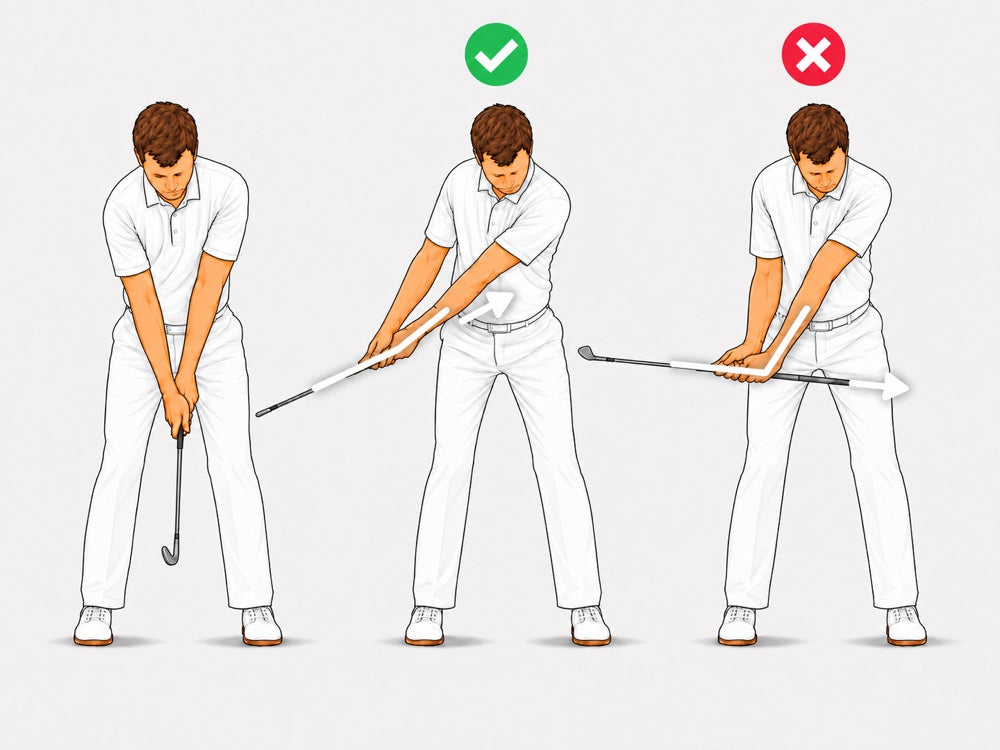
The takeaway is the start of the swing. Learn to start with the chest and shoulders instead of snatching the stick away with the hands.

  1. Place the end of the grip close to your stomach.
  2. Start slowly by turning your chest.
  3. Stop early, then repeat without speeding up.
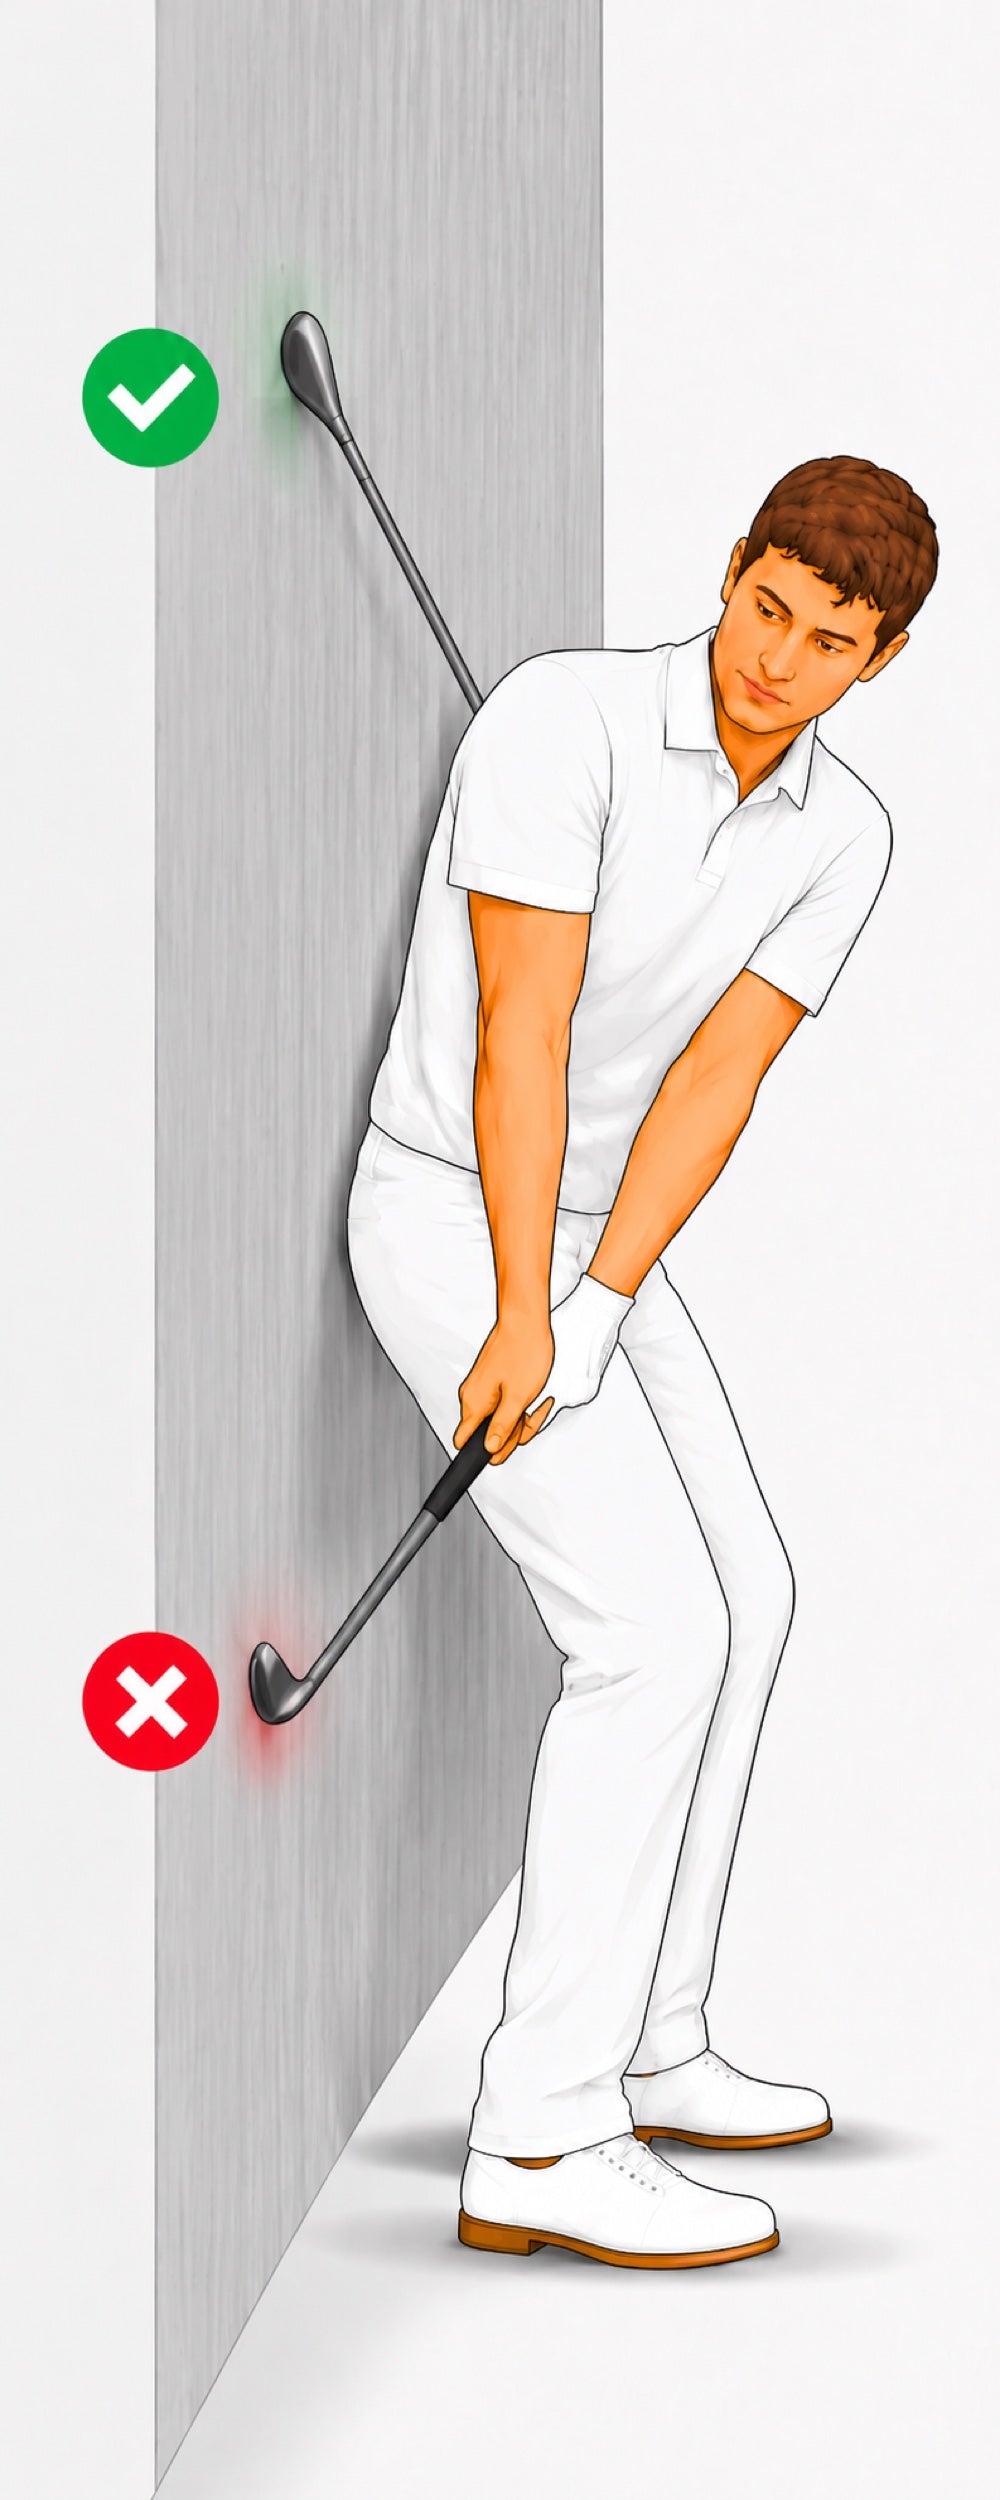
Correct path / wall
07

Correct path / wall

2 sets of 8 slow reps

This drill helps you feel when the stick travels too low or too far inside. Near a wall, the stick should pass high instead of touching the wall near your knees.

  1. Stand near a wall with enough room to move safely and slowly.
  2. Move the stick up gently.
  3. Look for a higher path without letting the stick get too low behind you.
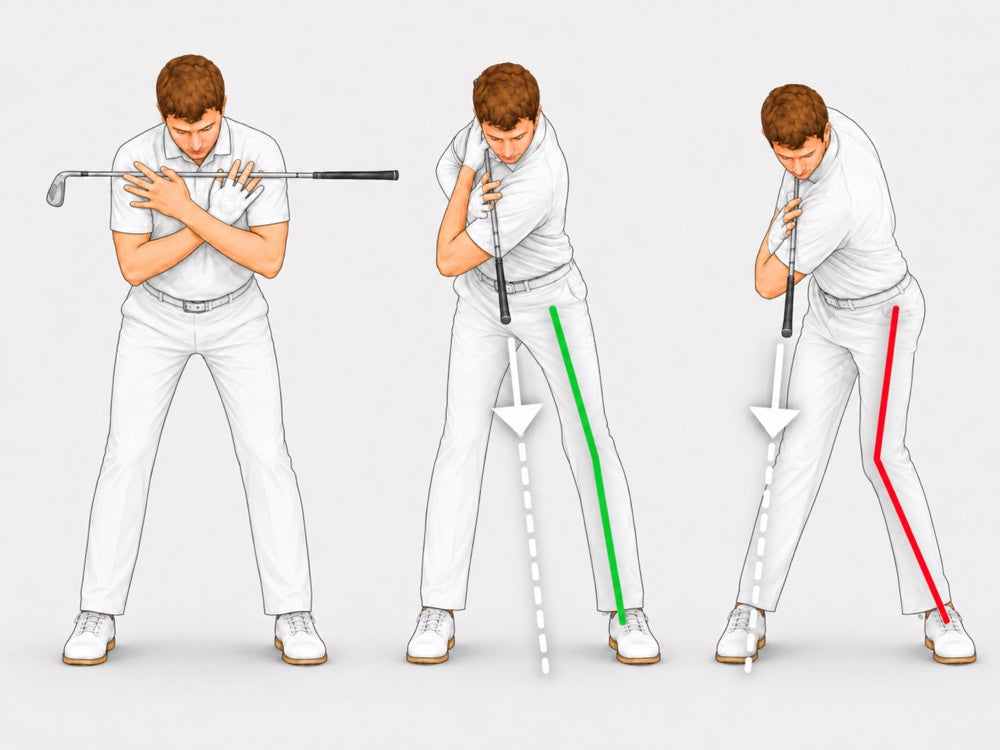
Shoulder rotations with stick
08

Shoulder rotations with stick

3 sets of 8 rotations each side

This drill teaches that the swing comes from chest rotation, not only the arms. The stick across the shoulders makes the turn easier to feel.

  1. Place the stick across your shoulders with your hands at the ends.
  2. Turn slowly to the right and then to the left.
  3. Keep your head calm and slow down if you lose balance.

Train at your own pace and stop if anything hurts. These drills are a complement to on-course practice, not a substitute for a qualified coach.